Wednesday, April 30, 2008

Ikea Cabinet Trim

There has been something bugging me about the Ikea cabinets, which is the trimwork around the bottom. The way my cabinets are laid out, there are no "same-size" cabinets next to each other. This means that the way I had them placed it would be difficult to do the bottom-trim the way I had planned.

I decided that the best way to accomplish my goal was to add an end-piece between each cabinet. That would allow me an easy task of putting in the face trim across the bottom front.

On the bad-side of doing this, I've got the extra cost of the material and the extra width in the overall run of cabinets.

In this picture you can see how the two side pieces help box in the sides of the taller cabinet. Once I add the front trim it'll be very difficult to see the lighting I will hide in there.


With two cabinets installed, I moved the new fridge in place to make sure I had enough room. Here is where a lot of pre-planning paid off, as it fit in with just enough space to make it look right. There is plenty of room on top of the fridge, although the trim I have yet to install there will make the cabinets look closer.

The fridge looks huge right now, but once the trim and counter tops are in place I expect it to look a little more to the right scale. The lower cabinet is sitting directly on the tile, and will end up sitting higher once I put it's legs on.

It doesn't really look like it, but the doors on the fridge are stainless. The sides are black. The stove, microwave, and dishwasher are the same.


Since these cabinets are in, I might as well get some use out of 'em! These new tall cabinets can hold a LOT more than the old ones.


The base cabinets will line up with the larger upper cabinets. I clamped a side-piece in place to see how it'll look. These pieces aren't cheap, so I plan to cut them in half so that the cabinets look fully trimmed, but if you pull the stove out you can see there the piece was cut. In this pic, only the left trim is in place. I'll add the trim to both sides which will match the upper cabinets.


These are the standard feet provided by Ikea. Injection molded plastic, which can be screwed in or out to adjust the cabinet height. This works well and can help make life easy on uneven floors. I'm not too concerned with the pieces breaking over time, as the cabinets will be screwed to the wall keeping them from moving. The foot design allows you to bridge two cabinets with one foot if desired, although I'm not sure why you would want to go with less support.

Another option for the base would be to build some custom base pieces from dimensional lumber.

The standard Ikea toe-kicks clip onto the legs. I don't know how sturdy that will be, and I might need to brace it up with some extra material. I don't remember ever kicking the toe-kicks a whole lot in the past, so maybe it'll work better than I expect.


Overall, I can't complain too much about anything regarding quality on the cabinets. It's no surprise as to how they're constructed or how they are installed. The only thing I'm not real happy with is the lack of information and options presented in the Ikea literature regarding trimming out the cabinets. The books and install directions don't really show any options, so it's up to the installer to figure things out.

I've said before that I obsess over details, and it's times like this where it pays off. I've only got one trim piece which I'm not sure how to handle yet, but given a few minutes I'll find a way to make it work.

Sunday, April 27, 2008

Installing the Upper Cabinets

I had hoped to do this yesterday, but I spent the better part of the day at a friend's bachelor party.

There is still a little work I need to do on the electrical connections before I can do the final install on the upper cabinets, but since I hung the cabinets I decided to install the doors and side-trim to see how everything is going to look.


At this time there is still a bunch of adjusting that will need to be done on the hinges for the doors. The hinge design allows you to adjust each door individually. You can also see a small gap between the doors, which is really a gap between the two cabinet boxes. After I get all the electrical work done the cabinets will be screwed together to make sure they're properly lined up. At that time, this gap will disappear.

Saturday, April 26, 2008

Grouting the Tile

I didn't take any "during" pictures of the grouting, because there is a limited time to work with the grout and I didn't want to mix up any more than necessary. I used a sanded grout with a flexible grout admixture instead of water.

It took only about 20 minutes to push the grout between the tiles, followed by a solid hour of cleaning them of grout haze. There is a very fine haze on them still, which I should be able to remove with a dry towel.

The two rows closest to the wall are mostly made up of the ugliest tiles I had, since they'll be covered by cabinets and appliances.


When doing tile work (or if you're in sales like I am...) a good set of knee-pads is in order. You don't want to crawl around on the floor scrubbing grout without some extra protection. Good sponges and plenty of clean water is in order. I use a two-bucket system. The first bucket is used to get most of the grout off the sponge and the second bucket is to help clean the sponge as much as possible before wiping the tiles.

Sunday night the grout should have dried long enough for me to seal it. After that is done I can put the appliances in place and start on the lower cabinets.


Speaking of the cabinets, I mentioned on an earlier post that I was going to trim the back edge of the upper cabinets to see if I could get the cabinets closer to the ceiling.

The plan worked, and I can put the cabinets within 1/8"-1/4" of the ceiling. I'm not sure if I'm going to do that yet though. I might go back to the original plan of using a trim spacer. I need to stand back and look at the options first before making the final choice.

Tuesday, April 22, 2008

Some Companies Really Don't Want my Business

So almost 4weeks ago I was blathering on about getting my water system upgraded. Read all the exhilarating details here:

http://muskegojeff.blogspot.com/2008/03/two-different-contractors-two-different.html

At the time, I was getting two estimates (and ended up going with the third guy). The second guy said he'd send me an estimate. I figured it'd be a couple days, maybe a week tops. Past that kind of time and they don't want my business.

Today the quote finally arrived! 25 days after coming out to look at the job. They looked at the job on March 28, the estimate worksheet is dated April 16, and the envelope is dated April 21. Yeah, these guys are a stickler for punctuality... Only the USPS did their job in a timely manner by getting me the mail in one day.

To top it off, they didn't even quote me the material I asked for. I asked for the Iron Curtain iron filter and separate water softener. They quoted me a combined unit and an overall price $1,000.00 higher than I ended up paying another guy two weeks ago!

Now the big question is do I just throw out the estimate and forget about it or send it back with a note explaining how their way of doing business is not going to help them earn customers in the future?

I'm leaning towards option C, sending it back with the various dates highlighted and a note saying that by the time they finally wrote up the estimate I had already been enjoying the system installed by another company for over a week.

Sunday, April 20, 2008

Paint Up, Travertine Tile Down

The plan for today was to paint the kitchen walls and get the tile down that would be below the appliances and lower cabinets. The paint was as uneventful as painting can be, so I'll just post the obligatory picture and be done with it. I didn't paint everywhere, as the cabinets would hide a lot of the wall, so why bother?


To keep the grout lines straight and in-line with the lines already done in the kitchen I could have used a chalk-line, but I'm not a fan of tracking the chalk dust around the kitchen. My method was to use my Ryobi laser level. I lined one end up with the current grout lines and the other end of the laser line with a mark on the far end of the kitchen.


Mounted on a tripod it was easy to keep it in place throughout the tiling.


About 2/3 of the tile I'm putting down today will be hidden under the appliances and lower cabinets. For those tiles in the first two rows I picked the ugliest and plainest tiles I had. Better looking tiles are reserved for areas that will be visible.


Here is the finished work for the day. The third row was done with the good looking tiles.


How'd the laser line work? Everything lined up pretty damn well, so I'll keep repeating this method as I continue with the floor in the future. Putting a mark at the far end of the floor I'm able to make sure that the width of the lines are consistent across the full length. The tile-spacers make nice little targets for the laser.


In a few days I'll grout the floor and will then be able to install the appliances. As of now we're without a stove until I finish this up and run the gas line. Oh, and speaking of the gas line, I guess I should have drilled the hole for it before putting down the cement board and tile..... Oh well.

Saturday, April 19, 2008

Prepping the Floor for Tile

The goal for the weekend is to get a substantial amount of "heavy" work done in the kitchen. Demo is done, and the third cost of plaster has been applied to the walls.

I'm thrilled with how the Dust Control joint compound has worked. All of the dust from the sanding fell within 2' of the wall. Nothing floating around the house, much less the rest of the kitchen.

While the final skim coat of mud is drying, I prepped the floor for the cement board. Normally I would prefer to remove the old layer(s) of linoleum, but considering they're both stuck very well to the floor and especially since there's a good chance that the bottom layer has asbestos, I'm leaving them in place.

I removed the lose edges and the base molding, and filled the low spots where there is no linoleum (the areas covered by the previous lower cabinets).


2-1/2 sheets of 4'x4' cement board and 150 screws later and the floor is ready for tile. I'm only applying tile to this small area of the floor for now, and when I do the other half of the kitchen I'll do the rest.

While I was screwing down the cement board, I took the opportunity to run some 3-1/2" deck screws through the cement board, linoleum, and sub-floor into the floor joists to get rid of a little squeeking where the old stove location was. It might have gone away on it's own after the tile is installed, but considering it reflects where the sub-floor is moving I figured it was best to get rid of the problem now so I don't have to worry about the grout cracking later on.


Once the floor was done, the drywall was ready for it's final sanding, followed by a coat of primer & sand texture.

Tomorrow morning I'll pick up some paint to give the walls a coat before doing the flooring and hanging the cabinets. Once the walls are painted I can start installing the floor tile. I figure I'll be installing about 35 square feet of tile.

Friday, April 18, 2008

Test Fitting the Ikea Cabinets

Today's goal was to get the drywall mostly done so that over the weekend I can hang the cabinets and start tiling the floor.

The first step was to get another layer of drywall mud on the joints so that it would have time to dry overnight. On it went, no big deal. I followed up with a sponge sanding. As it looks right now I'll have to give it a light sanding tomorrow morning before giving it the final skim coat.

After the mud had dried long enough to not be messy I put up the track for the upper cabinets. I started with the track about two inches higher than recommended by the Ikea instructions. Why? Because I knew I would have about 1/2" of floor build-up from the floor tiles and because I wanted a little more room above the counter tops. Everybody in my family is above average height, so it's not like we won't be able to reach the shelves. However, if midgets move in here after us, they're fvcked.


With the track up I could hang the cabinets. With the mounting track placed where it was, I had between 1-1/4" and 1-1/2" of gap between the ceiling and the top of the cabinet. Normally, when hanging the track at the recommended height you would only have the wall studs to screw into. By raising the track like I did I get to use the wall header giving me a lot more strength.


In the opening that will house the microwave I marked the stud locations. This will make it easier and quicker to screw the mounting plate to the wall. I had also marked the stud locations on the wall behind the cabinet before I knew where I was going to mount the cabinet rail.


The sides and bottom trim will provide a nice place to hide the under-cabinet lighting. The lights will throw a lot of light but not be visible to anybody but kids. Or midgets. The bottom trim will sit out farther forward, but I couldn't temporarily clamp it into place where it will finally sit.


Jumping back to the space above the cabinets, I had considered filling that gap with a small filler piece, but then changed my mind and decided to raise the cabinets to put them really close to the ceiling. I raised the track by 1". The cabinet mounting hardware allows me to move the cabinets up by 1/2", so in theory I should be able to put the cabinets right up against the ceiling.


"In theory" compared to "reality". The top and bottom of the cabinet extend back beyond the back wall of the cabinet so the cabinet sits flat against the wall, even though there is a mounting rail behind it. The drywall mud in the corner keeps me from pushing the cabinet up the full 1/2" I mentioned previously, so my plan is to cut off that top edge. Once it's cut off I should be able to get the gap down to about 1/8", a small enough gap to fill with caulking. The final result should be a nice clean install.


Tomorrow I'll pull the cabinets down and do the final mud work. By the end of the day or on Sunday I can paint & texture the wall and then hang them back up, possibly for the last time.

Tuesday, April 15, 2008

Slinging Mud

Time to start slinging mud. I need to have the kitchen ready for cabinet and flooring install this weekend, and time during the week will be short. In the past I have always used standard drywall joint compound.

This time around I'm using the compound with dust control. I wanted to buy one gallon, but the local Menards only sells it in the 3-1/2 gallon containers. I'm hoping it keeps until I get to the other side of the kitchen. Worst case scenario is that I'm out $12.00.

I've read from a couple of people that this dust control version is well worth the extra few bucks. I'll find out for myself.


It's been a couple of years since I've done any drywall work, so I got back into the swing of it by doing the easy sections first - the areas I cut out to run the cable through the studs.

It went on easily, and I gave it a going-over with a sponge after it set up a bit. If I'm lucky (and careful) I should have very little to sand.


Only about 1/3 of the joints will be visible once the cabinets are in place, which I'm really happy about. That means that I can do a semi-half-ass job on about 2/3 of the joints.

Even though most of them won't be visible I still hit 'em with the sponge, but I won't bother final sanding them. Only the visible parts will get the extra effort.

Now that the first layer of mud is on, I'll let it sit until Friday, which should be the next time I get time to work on it. There will be some shrinkage to deal with and I'll need to feather the edges a bit.

Overall I'm happy with how it's looking so far.

Sunday, April 13, 2008

Wiring and Patching Drywall for the Kitchen Remodel

The demo on one-half of the kitchen was done yesterday. Today the plan was to get the wiring installed and the holes patched with drywall.

I had five outlet boxes to install - one for a switch to control the under-cabinet lighting and four for outlets (including the one mounted high on the wall for the over-the-stove microwave. There are a number of ways people go about getting the wiring to each of the new outlets.

I wanted a reasonably straight-forward way of getting the wiring from stud-bay to stud-bay that didn't include running wire all the way up into the attic or down through the basement. What I did was to make the cut-outs for the outlets and then cut out the drywall between them.

I could then drill holes through the studs for the wiring. All the wiring could then go through a single hole in the floor plate.

If I were just adding wiring for the outlets I might have just run the wiring through the floor, but I needed to add a switched outlet for the under-cabinet lighting and tie it into what used to be the power line for the range vent hood. Lots of back and forth, so it was easiest to make an opening to get the wiring through the walls.


Here's a tip which will save a bit of work when it comes time to finish the wiring at the panel. Mark the end of the wiring with a description that makes sense to you. The one shown here is pretty obvious. If you're running a bunch of lines at the same time this will really help when it comes to labeling the new breakers.


Fast forward a couple of hours and the drywall is all in place. I need to clean up the edges a little and then I can start mudding. The patching in where the soffit used to be will be somewhat easier than it looks, as only about 1/3 of the seams will be visible once the new cabinets are in place. The ones which will remain hidden will be taped & mudded, but I won't waste much time getting them perfect.


Jumping back to the "before" picture, removing the soffit does open up the kitchen a bit. This wasn't my big goal though. My goal was gaining storage. Consider that the entire area covered with the soffit (plus more) is now storage. The cost to tear out and patch the soffit was about $20 in material.

Saturday, April 12, 2008

Removing Cabinets with Extreme Prejudice

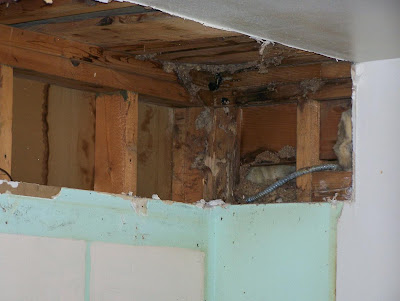
It took about half an hour, but the upper cabinets were removed without too much of a fight. I wanted to remove them without damaging the wall, because that will save me time later on if I don't have to fix it. I didn't care too much about the soffits, as those aren't staying.

I found that the easiest way to remove the cabinets was to simply cut the nails (LOTS of nails...) with a reciprocating saw. I worked a pry-bar between the wall and cabinet enough to loosen the cabinets enough to get the saw blade in and then down they came.

I still haven't figured out if the blue paint seen here was primer or if the room was actually painted this color. I really really hope it was just primer. Over the blue is painted a coat of olive green - not a real improvement in my opinion... You can easily see the outline of where the cabinets were, even after cleaning the walls with de-greaser.

The black spot in the middle is the vent for the range hood.


Tearing the soffits out wasn't too big of a project. I found that the best results were achieved by using the reciprocating saw to cut the inside corners by the ceiling and wall so that the drywall would break away easily as the inside structure was pulled apart. This kept the drywall from tearing.

The structure of the soffit was just 2x4 construction. I was concerned with hidden wiring, and actually got out with minimal wiring to deal with - just the one cable in the corner. I need to look at the structure of the wall to see if I can just notch the 2x4 to make room for it.

This corner also has some water damage from the previously leaking chimney flashing.


With the soffit removed, the kitchen does feel larger. I used some painter's tape to mark where the cabinets are going to be placed so I could make marks on the wall showing future outlet locations. The only outlet on that wall was used by the fridge and microwave, leaving nothing to power small appliances. When I finish this wall, the fridge and microwave will be on their own circuits and there will be a GFCI protected circuit for each counter top. The stove also has it's own circuit. Good thing I've got plenty of space open in the new electrical panel!


I started the electrical work by moving the plug which used to be for the fridge down low on the wall for the stove. I'm switching from an electric stove to a gas stove, so I can also remove the current 22ov outlet. Once the final location for the new stove is determined I can run the gas line for it. I got lucky in that the plug I moved was between the right studs and was just long enough to allow me to use it for the stove.

Now that the electrical line is run and tested for this outlet, I can patch the old outlet hole as well as the hole I made which was too low. Oops... Oh well, nobody will ever see it after the stove is in place and it'll be an easy patch.

Friday, April 11, 2008

Actual Real Kitchen Progress!

Since the water systems are now upgraded I can FINALLY turn my attention to the rest of the kitchen. I didn't want to start this work earlier, because I didn't want to install a dish washer that would just get messed up with rusty water.

That excuse is now gone, and our water is still blissfully clear.

The kitchen work will take place in two stages: South wall followed by North wall. South first because it'll be easier and will allow me to work out the bugs before I do the harder North wall.

First step was to empty out the cabinets and remove the doors. I plan to keep the cabinets in one-piece as much as possible to give them away. While I really hope that nobody would use them in their kitchen, I think they'd make good garage cabinets.


As I'm taking everything apart I find out how "old school" cabinet installers did their work here - by using multiple large nails per stud. Yay. Installing cabinets with screws makes cabinets much easier to install and remove. You can also see here how there are no "backs" to the cabinets. The back wall is actually the textured drywall. For some reason, I find this kind of disgusting. Probably because the walls in the kitchen have decades of gunk built up on 'em.


Uppers are cleaned out and the work has started on the base cabinets. The cabinet to the left of the stove came out easily Only one screw was holding it into the drywall. Not into the stud, but only into the drywall. Nice and secure. This cabinet wasn't original to the house.

The cabinet to the right of the stove was original and was installed very securely. So securely that it got destroyed in the process of removing it. I wanted to save the drywall more than the cabinet, because the new fridge will be installed there and I don't want to patch drywall if I don't have to.


One thing that was bugging me about the cabinets in the house is how the uppers and lowers didn't line up. I figured it was because the cabinet to the left of the stove was replaced at some point with a wider base or because there was originally a very narrow stove. From the paint that was covered by the lower cabinet for the last 50+ years and based on the sub-flooring, I was right. The lower and upper cabinets used to line up properly.


My original plan was to have the whole wall cleared of cabinets and appliances tonight, but we're dog sitting a friend's puppy and I'm stuck watching the dog instead of working. By end-of-day tomorrow I want to have the entire wall demo'd, including soffits, range vent, and flooring. If all goes well I'd like to have the drywall patching started for the soffets and maybe even some of the electrical changes laid out.

Saturday, April 5, 2008

New Water Systems are Finally Installed

Just as promised, my plumber showed up this morning (yes, on a Saturday) at 8:15. He worked straight through till 9:00 tonight and got the entire job done by himself.

Here's the water heater I started the day with. That weird looking hose to the left of it is the flexible gas line. I doubt this is up to code. The vent has a pretty long run to the chimney as well. This water heater is around 16-17 years old, and the water shut-off valve is corroded to the point where it doesn't work.


The water softener is probably a decade older than the heater. I think it still works, but it's hard to tell. Our water isn't hard, but the insides of this unit are completely caked in rust and junk from the well. Like the water heater, the valves are shot and need to go.


Hours later, here's the new layout. I didn't use this end of the basement for anything, so even with the extra equipment I'm not losing any usable space.

It may look like a lot of extra copper, but we only added slightly more than was taken out. There is a little back-tracking of the copper runs because we didn't lay things out in the order that the water flows (from iron filter to softener to heater). We decided it was better to put the heater close to the furnace so the gas supply line was short and so that the heater was close to the chimney.

The water softener (blue tank and black brine tank) were placed next to the sump crock so it would have a short run for the overflow vent should it ever be needed. The iron filter went in the middle 'cause that was the only space left.

All new bypass valves were installed, new hose bibs replaced the rusty & leaky old ones, and the system was leak-tested. Enough room was left between the parts to allow for easy access around 'em all.


After we got everything tested and the water started flowing, the system automatically started flushing as was expected. The iron filter can be set to flush every day, two days, three days, etc. so we're not wasting water. We set it for every three days and will see if that's often enough.

The water softener can also be set to flush every X days or after a certain number of gallons of water are used. We set it to flush every 850 gallons. Again, time will tell if that's a good setting for us. I need to pick up the salt for it tomorrow - I forgot to get it when I picked up the water heater.

I had the plumber do a couple of other changes while he was here, such as connecting the hose bibs to the filtered/softened water instead of running straight well-water through 'em. In front that was so we could wash the cars with the water and not have spots or stains. In back, it was because it was easier than running a separate line for straight well water.

I also had him plumb the gas line for my upcoming kitchen remodel. The stove we're putting in is gas and the line needed to be moved. He added a new shut-off valve for me as well.

Overall cost? $3,000.00 for all parts and labor (I supplied the water heater, he supplied everything else). With the water heater it came to $3,340.00. That's $1,000.00 less than the other plumber I was going to use, although the more expensive plumber's estimate included $400 for chimney lining. I figure I can line the chimney myself for under $100.00.

I would definitely use him again, and plan to to move the bathroom closet flange when I do the bathroom remodel.

Thursday, April 3, 2008

No Time Like the Present

So the plumber was here and looked the job over this past Tuesday. Nothing difficult. We went over the options and he gave me some ideas. Essentially I'm leaving it up to him to make it all work out. He told me he'd call me Wednesday (yesterday) with a price.

He also said he'd check on some prices to see if it'd be better for him to buy the water softener or if I should get it on my own.

How many stories have there been where contractors promised and didn't deliver?

This isn't one of those stories.

He called, and we decided that he should pick up the Iron Curtain iron filter and the water softener. I can get generic residential products at Home Depot or Menards, but for the same price he can get slightly better equipment.

I told him if he'll buy the products I'll pay him some extra to do so. It's worth it in gas and time savings for me. Plus, even though he's been a plumber for 20 years he's only had his own business for a year and it's good for him to get in front of the suppliers more often. I'll buy the water heater, since he can't really save me anything there.

Price we agreed on was $3,000.00, including re-running the gas line for the water heater. If the water heater costs me the $400 or so I'm expecting to pay, that'll be just over $500 less than the contractor I was going to go with, plus I get to help out "the little guy".

As of yesterday there was no date set for the work to begin. He'd check his schedule and get back to me in a few days.

"In a few days" turned out to be more like "the next morning". He called and said he's picking up the water softener and iron filter Friday (tomorrow) and would like to install everything this Saturday. HELLS YEAH!

Now I'm in a rush to go pick up a water heater. After working 9 hours, getting the kids homework taken care of, hitting the gym at work, and eating a quick salad for dinner (my brother just shit his pants after reading those last two items), it's time to go grab a 50 gallon water heater.

If he doesn't show I'll cry. In a manly way.

The only part that sucks is that the weather is supposed to be in the high 50's and sunny Saturday. Some of the best weather we've had since last fall.