Step one of the install was determining where we were going to put the light tube. I cleared away what little insulation we have and marked the hole. I had to offset it slightly to make room for existing electrical wiring. Pay no attention to the crappy light fixture. It'll be replaced when we get around to renovating the hallway.

My biggest concern with this job was cutting a hole in my brand new roof. The flashing process is straight forward, but it's still a bit unnerving cutting a hole in the roof in an area which up until now has been watertight. In this picture, you can see the trim ring which is visible in the hallway and the polished tube connections at both ends. These ends rotate allowing you to line them up. In between will be a straight tube of polished metal.

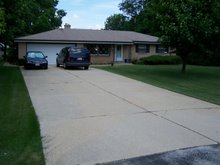
From the outside, the light tube is pretty low-profile. Instead of using the standard felt that the instructions call for to help create a water-shed under the shingles, I used some left-over ice & water dam from the re-roofing. This material is thicker and has a sticky back. As you stick nails through it, it seals around the nails. From the road, this dome doesn't stand out anywhere near as much as I thought it would. Normally I would have put this on the back side of the house, but there wasn't enough open space due to a roof vent and plumbing vent. On the plus side of having it on the front of the house, it's got a southern exposure so the light tube brings in more light.

Once it was done, it brought in as much light as I had hoped. Here's the hallway with all lights turned off and no flash on the camera. Still not enough light in the camera's opinion, but good enough for me. Now we really get a good look at the crappy skid-mark brown carpet. The project took about 4 hours, and wasn't nearly as difficult as I had expected it to be.


