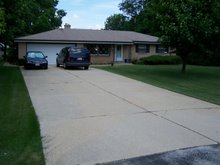
Storm of the decade.
The "perfect" storm.
Blizzard.
Whatever you want to call it, there's a whole sh1t-load of snow on the ground which wasn't here 24 hours ago.
Some areas are expecting 16-20". I'm guessing I'll end up with around 14" of heavy, wet snow. Luckily I remembered to hose the inside of the snow-discharge chute with WD-40 before starting snow-removal, or I'd be running into jam after jam in the snowblower.
The snow started somewhat light yesterday afternoon. By bedtime we had around 4". This morning around 5-6", and the storm was looking like it might not hit as bad as expected. Weathermen were still promising a huge storm, but they've been wrong before.
Either way, schools were closed and the kids were staying home. I was in to work this morning at 6:30, planning to take a half-day. I got home and started snow-blowing at about noon, removing around 8" of snow.
3 hours later I had to do it again, removing around 6" of new snow.
And it's still snowing, so I'm guessing that I'll break out the snow blower one more time tonight.
The sick thing is that I actually like it. The snow looks great when it's fresh, and the house feels nice and warm after busting ass removing snow from the driveway.
Unfortunately, this means just one more delay in getting the electrical system upgraded. Every time we have it scheduled, the weather screws up the plans. Go figure...
Wednesday, February 6, 2008

Tuesday, February 5, 2008
Hanging an Ikea Cabinet is Easy (So Far)
Once I actually start the real installation work on my cabinets, I want it to be as easy as possible. I've never installed cabinets before and the last thing I want to do is get stuck half-way through because of missing parts.
I figured that I will take some time while waiting for the electrical and plumbing upgrades and hang the cabinet I assembled the other day.
The Ikea literature makes it look easy, but then again why would they possibly make it look hard to do?
Step one was to find the high spot on the floor and measure up from there. A couple of lines are made on the wall, and the track shown here leaning against the wall is then mounted. Normally this track would be cut to length, but since I'm just doing this as a mock-up, I'm leaving it full length.

The cabinets are held to the track with these sliding metal bolts/glides.

With these sliding bolts installed, the cabinets can be slid left/right as needed for aligning the cabinet. Minor adjustments can be made up/down as needed as well.

From the inside of the cabinet, you can see how the cabinet box is held to the track with a nut and clip on each side.

From the side, you can see how the cabinet box is designed to be held straight, while straddling the track. The top and bottom of the "box" extend back fully to the wall while the sides are open for the track, wiring, etc.

With the box mounted, the doors easily clip into place. Shown here is the recommended mounting height.

Covers for the mounting hardware are included, and they slide in place.

After about 60 seconds of tweaking the hinges, the bottom edges of the doors line up nicely.

Not so for the handles. I didn't do a good enough job in drilling the holes, so on each door the right handle hole is slightly higher than the left. It'll take about 3 minutes to fix, but when it comes time to do all the handles I'm going to build or buy a handle jig. This isn't noticeable, but I know it's not right and it bothers me.

From the recommended mounting height, I end up with about 3-1/2" between the top of the cabinet and the ceiling. While that works, I think it's a little too much. My plan is to move the cabinets up about 1 to 1-1/2" so I can use a smaller filler strip to cover the gap. This will also give me more clearance above the counter tops. Before I make this decision for sure though I'll build one of the larger cabinets and see how it lines up with our current cabinets.

At this point, the cabinet is pretty bare looking. There are no side-trim pieces installed and the trim along the bottom has not been installed.
I figured that I will take some time while waiting for the electrical and plumbing upgrades and hang the cabinet I assembled the other day.
The Ikea literature makes it look easy, but then again why would they possibly make it look hard to do?
Step one was to find the high spot on the floor and measure up from there. A couple of lines are made on the wall, and the track shown here leaning against the wall is then mounted. Normally this track would be cut to length, but since I'm just doing this as a mock-up, I'm leaving it full length.

The cabinets are held to the track with these sliding metal bolts/glides.

With these sliding bolts installed, the cabinets can be slid left/right as needed for aligning the cabinet. Minor adjustments can be made up/down as needed as well.

From the inside of the cabinet, you can see how the cabinet box is held to the track with a nut and clip on each side.

From the side, you can see how the cabinet box is designed to be held straight, while straddling the track. The top and bottom of the "box" extend back fully to the wall while the sides are open for the track, wiring, etc.

With the box mounted, the doors easily clip into place. Shown here is the recommended mounting height.

Covers for the mounting hardware are included, and they slide in place.

After about 60 seconds of tweaking the hinges, the bottom edges of the doors line up nicely.

Not so for the handles. I didn't do a good enough job in drilling the holes, so on each door the right handle hole is slightly higher than the left. It'll take about 3 minutes to fix, but when it comes time to do all the handles I'm going to build or buy a handle jig. This isn't noticeable, but I know it's not right and it bothers me.

From the recommended mounting height, I end up with about 3-1/2" between the top of the cabinet and the ceiling. While that works, I think it's a little too much. My plan is to move the cabinets up about 1 to 1-1/2" so I can use a smaller filler strip to cover the gap. This will also give me more clearance above the counter tops. Before I make this decision for sure though I'll build one of the larger cabinets and see how it lines up with our current cabinets.

At this point, the cabinet is pretty bare looking. There are no side-trim pieces installed and the trim along the bottom has not been installed.
Sunday, February 3, 2008
Ikea Upper Cabinets and Flavorful Ceiling
The SuperBowl is on, and I'm not really a fan of either team (although I'd rather see the Giants win because I think Randy Moss is the biggest a-hole in the game).
To kill a little time I decided to build one of the upper cabinets we just picked up from Ikea today to see how the construction will be compared to the lowers.
The main "box" itself is no difference other than it being smaller than the base cabinet's box. Also, instead of drawers it's got two doors and interior shelves.
The only real decision we had to make was the orientation of the handles. At first, we planned to install them vertically (the base cabinet handles are horizontal). After looking at it a little while, we decided to match the base cabinets and mount them horizontally.
On this picture you can see how the grain of the wood doesn't flow from one door to the other. Some people wouldn't like this, but it doesn't bother us. I've seen pictures of finished kitchens with these doors and I like how it looks like this. Realistically, 98% of people out there would never even notice it.

The hinges were included with the cabinets, and overall, I'm very impressed with them. There is a lot of adjustment available in each hinge, allowing you to tweak each door as needed to make sure everything is lined up properly.
Each hinge has two screws for adjustment. One screw pushes the door attached at that hinge in or out, and the other hinge adjusts the door left or right (when the door is closed). In theory, this will allow you to make sure each door is exactly flush with the door next to it and also allow you to make sure gaps are even all the way around.

This cabinet is going over the refrigerator, and what amazes me is that this cabinet is bigger than any of the current upper cabinets we have on either side of the kitchen. What mainly accounts for this is that we're removing the existing soffits.
On this side of the kitchen alone, we are going to lose about 2 square feet of floor space to the larger cabinets (space we really won't miss), but in return we are going to gain about 12-15 cubic feet of storage. We will also gain 2 more square feet of new counter top space plus regain about 2 square feet of space currently used by the microwave which sits on the counter.
I threatened earlier to post a picture of the ceiling above our stove. This picture shows why it's so important to not only have and use a vent fan over the stove, but to actually vent it outside! The fan above our stove is not connected to the ductwork in the attic, meaning somebody in the past did some really half-ass work and never completed the job.
Any time you use our stove top, even if you run the fan, all the smoke/grease goes right up to the ceiling. For contrast, I put a clean sheet of paper in the picture. I'm hoping I can de-grease this mess enough for new paint to stick.

The snozzberries taste like snozzberries!
To kill a little time I decided to build one of the upper cabinets we just picked up from Ikea today to see how the construction will be compared to the lowers.
The main "box" itself is no difference other than it being smaller than the base cabinet's box. Also, instead of drawers it's got two doors and interior shelves.
The only real decision we had to make was the orientation of the handles. At first, we planned to install them vertically (the base cabinet handles are horizontal). After looking at it a little while, we decided to match the base cabinets and mount them horizontally.
On this picture you can see how the grain of the wood doesn't flow from one door to the other. Some people wouldn't like this, but it doesn't bother us. I've seen pictures of finished kitchens with these doors and I like how it looks like this. Realistically, 98% of people out there would never even notice it.

The hinges were included with the cabinets, and overall, I'm very impressed with them. There is a lot of adjustment available in each hinge, allowing you to tweak each door as needed to make sure everything is lined up properly.
Each hinge has two screws for adjustment. One screw pushes the door attached at that hinge in or out, and the other hinge adjusts the door left or right (when the door is closed). In theory, this will allow you to make sure each door is exactly flush with the door next to it and also allow you to make sure gaps are even all the way around.

This cabinet is going over the refrigerator, and what amazes me is that this cabinet is bigger than any of the current upper cabinets we have on either side of the kitchen. What mainly accounts for this is that we're removing the existing soffits.
On this side of the kitchen alone, we are going to lose about 2 square feet of floor space to the larger cabinets (space we really won't miss), but in return we are going to gain about 12-15 cubic feet of storage. We will also gain 2 more square feet of new counter top space plus regain about 2 square feet of space currently used by the microwave which sits on the counter.
I threatened earlier to post a picture of the ceiling above our stove. This picture shows why it's so important to not only have and use a vent fan over the stove, but to actually vent it outside! The fan above our stove is not connected to the ductwork in the attic, meaning somebody in the past did some really half-ass work and never completed the job.
Any time you use our stove top, even if you run the fan, all the smoke/grease goes right up to the ceiling. For contrast, I put a clean sheet of paper in the picture. I'm hoping I can de-grease this mess enough for new paint to stick.

The snozzberries taste like snozzberries!
The Ikea Cabinet Fairy Paid us a Visit
In my never-ending quest to crush the suspension on the family truckster, we took a drive down to Ikea today to get all of the cabinets which will be installed in 1/2 of the kitchen.
With the third row of seating removed, everything fit well and I could have fit in a couple more boxes if needed.
 After this half of the kitchen is done I'll make another trip to get the cabinets for the other half.
Why not get everything in one trip? Because there is no way it'd all fit without breaking the suspension.
Plus, even though I'm fairly sure I know what items are needed, I know there will be some waste and I don't want to go overboard on scrap. By doing this in two trips I should minimize material waste, save the van, and have less material taking up space in the house.
Plus, Mrs. Muskego Jeff likes to shop the store and since it's over an hour away, she doesn't get to go there often.
I mentioned in the previous post about Ikea cabinets that we were given a wrong piece when I got the first test-cabinet. Two cabinet drawer doors were missing and I was given a side trim-piece by accident. Today, I was shorted the same pieces and given the same wrong pieces. The part numbers aren't even close together, so I don't know how they made the same wrong mistake twice in a row, unless the pieces are stored in the same spot in their warehouse.
This time, however, I was smart enough to take inventory as I was loading the van. The workers there are either very trusting or see this problem often, as all I needed to do was go back to the merchandise pick-up desk and tell them I was missing two pieces and they got 'em and handed them to me. If I had less impressive morals, I could have gotten some extra door fronts by simply lying.
Regarding the purchase of the cabinets, everything went ridiculously smoothly. I'll credit a lot of this to my anal retentive attention to detail. Instead of just using the layout program available on Ikea's website, I downloaded a small CAD program (Delta Cad) and drew everything to scale. Their layout program is useful, but notoriously quirky. Here's what I came up with:

Something that isn't really clear in the planning program is that side trim-pieces are sold separately, so you only buy what you need. If you have a row of cabinets side by side, you don't need outside trim for each. In my case, I needed trim for most pieces.
I also had listed pricing from the catalog in the drawing so that I would know approximately how much this trip was going to cost. I was pretty much dead-on accurate until the trim was added (it wasn't listed in the catalog, so the price was a guess for me).
The dude at Ikea who took care of the sale for me needed a total of about 7 minutes to get everything rung up, including the mounting hardware for the upper cabinets (which I forgot). Since I listed part numbers all he had to do was type in what I had already listed.
This was probably the easiest sale he had to deal with all day, and also saved me a lot of headaches because the kitchen area at Ikea is typically very busy.
With the third row of seating removed, everything fit well and I could have fit in a couple more boxes if needed.
 After this half of the kitchen is done I'll make another trip to get the cabinets for the other half.
Why not get everything in one trip? Because there is no way it'd all fit without breaking the suspension.
Plus, even though I'm fairly sure I know what items are needed, I know there will be some waste and I don't want to go overboard on scrap. By doing this in two trips I should minimize material waste, save the van, and have less material taking up space in the house.
Plus, Mrs. Muskego Jeff likes to shop the store and since it's over an hour away, she doesn't get to go there often.
I mentioned in the previous post about Ikea cabinets that we were given a wrong piece when I got the first test-cabinet. Two cabinet drawer doors were missing and I was given a side trim-piece by accident. Today, I was shorted the same pieces and given the same wrong pieces. The part numbers aren't even close together, so I don't know how they made the same wrong mistake twice in a row, unless the pieces are stored in the same spot in their warehouse.
This time, however, I was smart enough to take inventory as I was loading the van. The workers there are either very trusting or see this problem often, as all I needed to do was go back to the merchandise pick-up desk and tell them I was missing two pieces and they got 'em and handed them to me. If I had less impressive morals, I could have gotten some extra door fronts by simply lying.
Regarding the purchase of the cabinets, everything went ridiculously smoothly. I'll credit a lot of this to my anal retentive attention to detail. Instead of just using the layout program available on Ikea's website, I downloaded a small CAD program (Delta Cad) and drew everything to scale. Their layout program is useful, but notoriously quirky. Here's what I came up with:

Something that isn't really clear in the planning program is that side trim-pieces are sold separately, so you only buy what you need. If you have a row of cabinets side by side, you don't need outside trim for each. In my case, I needed trim for most pieces.
I also had listed pricing from the catalog in the drawing so that I would know approximately how much this trip was going to cost. I was pretty much dead-on accurate until the trim was added (it wasn't listed in the catalog, so the price was a guess for me).
The dude at Ikea who took care of the sale for me needed a total of about 7 minutes to get everything rung up, including the mounting hardware for the upper cabinets (which I forgot). Since I listed part numbers all he had to do was type in what I had already listed.
This was probably the easiest sale he had to deal with all day, and also saved me a lot of headaches because the kitchen area at Ikea is typically very busy.
Saturday, February 2, 2008
Bagless Vacuums do not Suck
Recently our old vacuum decided to give up the ghost on us. It didn't go out with a whimper - it actually scared the hell out of my daughter who was using it at the time.
I thought she had tried to vacuum up a Lego or some other hard object, which then got stuck in the beater bar, jamming the motor. I grabbed a screwdriver and took it apart to see what happened, and found that half of the impeller blades were broken, which actually broke the whole motor assembly case. Not an easy/cheap fix, so we tossed it out and got a new vac.
The two main choices for us were traditional bag vacuums and the newer style bagless vac. We've always had bag vacs in the past, and it always seems that we're running out to buy bags. We gave the bagless style a shot this time around. A Hoover 12amp, to be specific.
In this case, the dirt is sucked in to the main chamber on the left. A fine screen separates that open chamber from the filter on the right. Small dust gets through the screen and trapped on the filter. Anything which gets past this filter gets picked up by one of two more filters. Compare that to just a single bag designed to trap everything.
On the downside, the available space to hold the picked up dirt is small compared to a bag, but considering you can just empty the collection bin be back in business in a minute, it's a small price to pay. Typically I end up having to empty the bin after a full vacuuming of the house. If I don't do this, it blocks the screen and filter too much which reduces suction.
Here's the empty vac ready for action.

After just a few minutes and two rooms, I've got a good collection of dust going. This brings up the real down-side of a bagless vac - you end up seeing just how much crap you've got in your carpets. With two kids, two adults, a dog and a cat in the house, this can be pretty nasty looking at times. Dumping the container can get a little messy, since everything isn't contained in a simple-to-dispose-of bag.

One thing I've noticed is that after vacuuming my allergies usually do not cause me too many problems. With our old vac, this wasn't the case. I'd get a bagless again in a second. The hastle of dumping the container after each use is minimal compared to how creating a dust-storm every time we clean.
I thought she had tried to vacuum up a Lego or some other hard object, which then got stuck in the beater bar, jamming the motor. I grabbed a screwdriver and took it apart to see what happened, and found that half of the impeller blades were broken, which actually broke the whole motor assembly case. Not an easy/cheap fix, so we tossed it out and got a new vac.
The two main choices for us were traditional bag vacuums and the newer style bagless vac. We've always had bag vacs in the past, and it always seems that we're running out to buy bags. We gave the bagless style a shot this time around. A Hoover 12amp, to be specific.
In this case, the dirt is sucked in to the main chamber on the left. A fine screen separates that open chamber from the filter on the right. Small dust gets through the screen and trapped on the filter. Anything which gets past this filter gets picked up by one of two more filters. Compare that to just a single bag designed to trap everything.
On the downside, the available space to hold the picked up dirt is small compared to a bag, but considering you can just empty the collection bin be back in business in a minute, it's a small price to pay. Typically I end up having to empty the bin after a full vacuuming of the house. If I don't do this, it blocks the screen and filter too much which reduces suction.
Here's the empty vac ready for action.

After just a few minutes and two rooms, I've got a good collection of dust going. This brings up the real down-side of a bagless vac - you end up seeing just how much crap you've got in your carpets. With two kids, two adults, a dog and a cat in the house, this can be pretty nasty looking at times. Dumping the container can get a little messy, since everything isn't contained in a simple-to-dispose-of bag.

One thing I've noticed is that after vacuuming my allergies usually do not cause me too many problems. With our old vac, this wasn't the case. I'd get a bagless again in a second. The hastle of dumping the container after each use is minimal compared to how creating a dust-storm every time we clean.
Exploratory Surgery
Killing time this morning I was reading a few blogs where there was kitchen remodeling involved.
One in particular got me a little worried, as they found out a little late that removing the soffits opened up a whole world of pain due to buried heating ducts and plumbing.
Granted, this work was being done on a two-story house and I'm working on a ranch, but it still made me worry a little about what I could find if I don't do some exploring now.
Since I've got a ranch house, the only plumbing above the kitchen will be plumbing vents which are vented through the roof. There is also no HVAC ducting to deal with, as it's all run under the floor and easily accessible from the basement. There is a small amount of ductwork for the vent above the stove, but I know this runs through the wall. Hell, it's not even hooked up right now, and since the stove location will change with the remodel, I plan to change it out to make it functional. Eventually I'll post a picture of the ceiling above the stove and show why it's nice to have a working stove vent...
I do know there is at least a little bit of electrical wiring in the soffit above the sink, as there is an electrical outlet for a clock there. Depending on where those wires trace back to, I might be able to re-use them as a power source for the under-cabinet lighting I'm going to add.
This is the soffit above the sink. The ceiling has not yet been painted, and only the wall to the right has been painted since we moved in. I can't wait to get rid of these cabinets. The open door does not close properly due to stripped out screws on the hinges and misaligned closing magnets. You can see the edge of the clock outlet at the far left side of the picture.

On the other side of the kitchen (the stove side) is it's twin. Again, I stopped painting where I knew the demolition would begin.

Having never opened up a soffit before I didn't know what to expect. My assumption was that it was either going to be an open box with some structure inside or that it'd be filled with insulation from the attic. I was hoping for an open box. A couple of hammer hits told me that it wasn't going to be as easy as I had hoped.

The soffits - or at least the ends - are filled with insulation. I haven't dug around in the attic insulation to verify, but I assume this is because they are open to the attic above. Oh well, it's better than having to re-run plumbing!

Since our remodel plans include a lot of new insulation in the attic (blown-in, if possible) I'm going to push that part of the work back a few months and do it after I get the soffits removed and covered with new drywall. That'll keep the new insulation in the attic, where it'll do more good for our heating bills.
One in particular got me a little worried, as they found out a little late that removing the soffits opened up a whole world of pain due to buried heating ducts and plumbing.
Granted, this work was being done on a two-story house and I'm working on a ranch, but it still made me worry a little about what I could find if I don't do some exploring now.
Since I've got a ranch house, the only plumbing above the kitchen will be plumbing vents which are vented through the roof. There is also no HVAC ducting to deal with, as it's all run under the floor and easily accessible from the basement. There is a small amount of ductwork for the vent above the stove, but I know this runs through the wall. Hell, it's not even hooked up right now, and since the stove location will change with the remodel, I plan to change it out to make it functional. Eventually I'll post a picture of the ceiling above the stove and show why it's nice to have a working stove vent...
I do know there is at least a little bit of electrical wiring in the soffit above the sink, as there is an electrical outlet for a clock there. Depending on where those wires trace back to, I might be able to re-use them as a power source for the under-cabinet lighting I'm going to add.
This is the soffit above the sink. The ceiling has not yet been painted, and only the wall to the right has been painted since we moved in. I can't wait to get rid of these cabinets. The open door does not close properly due to stripped out screws on the hinges and misaligned closing magnets. You can see the edge of the clock outlet at the far left side of the picture.

On the other side of the kitchen (the stove side) is it's twin. Again, I stopped painting where I knew the demolition would begin.

Having never opened up a soffit before I didn't know what to expect. My assumption was that it was either going to be an open box with some structure inside or that it'd be filled with insulation from the attic. I was hoping for an open box. A couple of hammer hits told me that it wasn't going to be as easy as I had hoped.

The soffits - or at least the ends - are filled with insulation. I haven't dug around in the attic insulation to verify, but I assume this is because they are open to the attic above. Oh well, it's better than having to re-run plumbing!

Since our remodel plans include a lot of new insulation in the attic (blown-in, if possible) I'm going to push that part of the work back a few months and do it after I get the soffits removed and covered with new drywall. That'll keep the new insulation in the attic, where it'll do more good for our heating bills.
Time Flies
Yesterday marked the one-year anniversary of our moving in to this place.
While this house wasn't the one we really wanted at the time we bought it (our first choice sold to another buyer), it turns out to be a better house for us in a better location. 10 minutes to work for both of us, a nice 1/2 acre yard in a quiet subdivision, and close enough to "civilization".
To mark the anniversary, I plan to go out today and buy the rest of the cabinets needed for 1/2 of the kitchen.
Since I'm going to do the cabinets and flooring in two stages, I might as well buy material in that manner too. This will also allow me to figure out all the little details so I know what to expect for the other half of the cabinet work, as the second stage will be larger and more involved.
I budgeted $3,000.00 for upper and lower cabinets, and it looks like I might hit that number dead-on.
While this house wasn't the one we really wanted at the time we bought it (our first choice sold to another buyer), it turns out to be a better house for us in a better location. 10 minutes to work for both of us, a nice 1/2 acre yard in a quiet subdivision, and close enough to "civilization".
To mark the anniversary, I plan to go out today and buy the rest of the cabinets needed for 1/2 of the kitchen.
Since I'm going to do the cabinets and flooring in two stages, I might as well buy material in that manner too. This will also allow me to figure out all the little details so I know what to expect for the other half of the cabinet work, as the second stage will be larger and more involved.
I budgeted $3,000.00 for upper and lower cabinets, and it looks like I might hit that number dead-on.
Subscribe to:
Posts (Atom)