Friday, April 13, 2007

Crush!

20 boxes of 10 pieces, 12" travertine.
9 boxes of 24 pieces, 8" travertine.
2 boxes of 10 sheets (6 pieces x 6 pieces), 2" travertine.
200 pounds of thinset.
75 pounds of sanded grout.
2 gallons of grout admixture.
1 3'x5' heating mat and thermostat.

All in one Dodge Grand Caravan with a 230 pound driver, four bucket seats, and one bench seat.

How much did it weigh? A lot. I'm guessing there was easily over 2,000 pounds of tile and mix.

Before:


After:


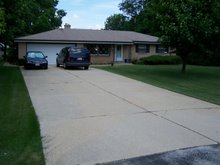
It may not look that bad, but that's low enough to drag the exhaust tip upon exiting the parking lot - lower than I've ever had it ride. Yeah, I'm pretty sure I easily exceeded the gross vehicle weight. In fact, I know I had very little suspension travel left (if any) in the back end. Luckily it isn't a long drive from the tile shop to my home. The steering sure felt light though! :)

Wednesday, April 11, 2007

Getting Ready for Christmas!

Seriously now, this weather is just plain weird. Two weeks ago the weather was great. The kids were able to play in their shorts, the ground was drying out and firming up, life was good.


Today we get this crap. It's my fault for continuing to live in this state, but my wife wouldn't let me leave. We probably got 5" of heavy packed snow and are expecting more. Luckily, the ground is still warm and it won't last. Heck, I'm not even going to shovel or break out the snowblower. I'll just wait it out. With my luck, we'll get a hard-freeze over the next day or two and my driveway will become an icy, rutted, mess. If that happens, feel free to point and laugh.

Tuesday, April 10, 2007

Ramen Noodles are my Future

Damn, travertine tile gets real expensive when you buy enough for a kitchen/dining room, bathroom, and entry way all at the same time! I guess I know what I'm going to be doing for the next year.

The plan is to do the full bathroom floor and entry floor in the same way we did the half-bath - 2 rows of 2" tile around the perimeter and 8" turned 45 degrees on the inside. The same 8" tile will be run straight up the shower walls, with an accent row of the 2" tiles worked in somehow to keep it interesting. The kitchen & dining areas will be 12" tile run across the whole area, approx 200 square feet.

This is what I put in for the half bath, which convinced us to go with it in the other rooms (shown here before I painted the walls - not bad for my first attempt at travertine if I do say so myself!) :


Eventually (if we have money left over) we'll go with some granite tile for the counter tops in the kitchen and bathroom. Unless we save money somewhere along the line, plywood is more likely in our future!

Monday, April 9, 2007

Bye Bye 1960s Design Hell

Instead of doing anything "productive", I decided to get destructive and remove a couple of the details on the house which I really hate. First to go were the vertical wall slats/dividers, shown below.


Yeah, they were in good condition, but they were a bad design idea 45 years ago and haven't gotten any better in my book. Out came the 3 pound sledge and five minutes later I was left with this:


That's a mirror on the near wall, by the way. It's going away soon, too. Although I dislike it, I don't want every wall in the house empty and full of nail & screw holes. After I took this picture, I tore down the same detail which was by the front door (in the background of this pic). When I start the kitchen renovation, I'll tear down the rest of these partial-walls and patch the drywall to hide the fact that the walls were ever here.

I was on a roll, tearing out crappy old details I hated, so I turned my evil gaze towards something my dad would love - wood paneling! It was actually installed well and was decent quality crap - er, wood paneling. My big worry was that it was nailed and glued to the wall, as that's how I would have done it. Lucky for me, the guy who did it wasn't quite as anal-retentive as me and only nailed it over some ugly green paint.


For now, I've re-used the goofy old switch plate cover the previous owners installed. The wall is now full of old nail holes, grime, and ugly green and blue paint. It's still better than when it was covered with paneling. To make it a little nicer, I'll patch the holes and sand the wall making it ready for new knock-down texture, primer, and paint. Those steps will be a while from happening, but at least I am happier with it.

Saturday, April 7, 2007

Cordless Tools - a Reason to Live

*** Hey, Ryobi! How about putting me on the payroll? ***

Talking to a co-worker yesterday, the conversation turned to home renovation and tools. He's of the mindset that the only good tools are the type with plugs. His exposure to good cordless tools must have been very limited, as I've got and worked with corded and cordless tools for renovation work and am of the opinion that decent cordless tools are worth their weight in gold. I started looking for cordless tools when I was renovating a condo a few years ago. My buddy and I were constantly turning off electrical circuits for the work we were doing and Murphy's Law dictated that any circuit we had tools plugged into would go dead. It became a hastle as the cords would have to reach from one side of the condo to the other (plus they kept getting tangled up) so on one of the daily trips to Home Depot I picked up a couple of Ryobi 18V tools - what they call their "Renovator Combo Kit".


I was impressed with how well they worked and how long the batteries lasted, so over time I went back and picked up the hammer drill, right angle drill, impact driver, planer, and caulk gun (yes, a battery powered caulk gun - it's a LOT more useful than you'd think). Now, I've got about a dozen different tools which all use the same battery packs and have found no issues with quality. Sure, they're not DeWalt or Milwaukee tools, but they're substantially less expensive meaning I can get MORE of 'em for the money. Checking out their website, I found they've also just released a leaf blower and pole pruner which I could use as well. I'll also pick up the air compressor, fan, stapler, and angle grinder before too long. While I wouldn't rely on a battery powered tool to fully take the place of all plug-in or gas powered tool, their convenience is sure hard to beat.

Time for Laundry - This Time With Style!

It's a small victory in a large war, but the new laundry sink is finally in and ready for action. As you no doubt recall from an earlier post, I needed to replace the old cement & steel laundry sink. It weighed about 900 pounds and the steel legs were rusting away. Not a good combination. I did some test fitting previous to today and had things ready to go, but needed to make a couple of minor changes. With the old tub, the water lines connected to the top of the faucet (which was trashed). The new tub's faucet connected from underneath, so I ran a couple of braided steel lines with shut-off's. Since the sink needs to be up against the wall for stability (it's plastic, after all) I had to drill a couple of 1" holes in the backboard of the sink. Easy solution, and problem solved. A little quality-time with my Ryobi cordless hammer-drill and the holes are drilled for the concrete screws. It's amazing how much more sturdy the sink is with a couple of anchors in place. The last piece of the puzzle will be to take care of the drain line from the water softener (just to the left of the faucet). I just need to cut out about 12" of the line and splice it back together. It's copper, and I added a short length of plastic tube at the end to better divert the water into the tub. To the right of the tub is one of two drain stacks in the house. The last thing I wanted to do was to break anything connected directly to the stack. So far, so good!


While I was in the basement, I took the opportunity to finally get some boxes out of the way. We had started stacking the still-boxed stuff as we were moving in, but when we had some heavy rain I found a small trickle of water coming in at the same corner of the basement where we were stacking boxes. It appears that the gutters hadn't been cleaned for at least a decade, and plenty of water was flowing out over the gutters. After taking care of that mess, it appears that my basement leak problems are done (for now?). To be safe, I picked up some 2x2 floor panels which are tongue-and-groove, with a plastic egg-carton bottom. They're designed for basement renovations to avoid water problems. I'm spreading them out a bit compared to how they're typically used in an effort to avoid more spending than necessary. At $4.95 each, they're cheap insurance from water damage to our boxes.

Freakin' Cold Weather

Overnight in the teens, high temp today should hit 37. Normally, I couldn't care less as I've got plenty of work to keep me busy inside. As I was getting some stuff from the basement, I noticed that the sump pump well was full and ready to turn on to send the water outside. Well, I'm always ready to see my handy-work in action, so I trip the pump and wait. Hmmm.... the water level isn't going down but the pump is running. WTF? A quick trip outside and I find the problem. The water line leaves the house in the middle of the rear of the house. Instead of simply dump the water straight onto my patio, the line hangs a left and goes all the way to the side of the house - approx 20' of pipe. The pipe is laying on the ground and has some dips in the line where water can pool. Well, that pooled water froze and the line is now plugged. Since the dirt has built up so much over the decades, there really isn't any good slope to the yard anymore for this to work as it should.

The problem has just now started thanks to that wonderful check valve I installed. Previously, the water could drain back out of the line from either end. Now, once it's in the line it's in the line and won't go anywhere unless the slope allows gravity to do it. Once it warms up a little this will be added to the project list. I don't want to get rid of the check valve, but I'd also like the pump to be able to work.