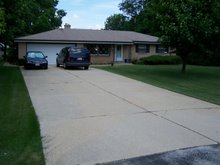
We had a pretty major storm roll through today.
This was the hardest rain I've seen since we moved in, and the most rain in such a short time (3-4 hours) my neighbor has seen in his 26 years in this neighborhood.
I expected that I would get some water in the basement, as it's happened before when we got some major storms. But this storm was just a little heavier than usual.
While I was in the basement moving some stuff out of the way of the water so it had a clean path from the wall to the floor drain I heard what sounded like a hose running. Inside the house. Not a good sound to hear.
I noticed some water dripping down the dryer's exhaust vent and I figured that was what was making the sound. Only there wasn't enough visible water to justify the sound.
So I pulled the dryer away from the wall and pulled the vent off the back and was greeted with a flood of water coming down through the vent. It was about equal to what you'd get by sticking a garden hose in the vent.
As of this morning, the dryer worked well. I'm hoping that it was designed with the electronics up high enough in the box to avoid water damage, otherwise I'll be buying a new dryer in a few days. I'm going to give this one a few days to dry out just to be safe.
Other than the possible dryer, there was no damage done other than a few empty cardboard boxes getting soaked. I'd say that there were easily over 500 gallons of water that flowed through the basement today, and I know I'm luckier than some others in the neighborhood.
I took a drive with my neighbor after the storm stopped, and we were amazed at how much water was flowing in the ditches and creeks. At one point I estimate we were driving through at least 6" of water.
What really surprises me is how stupid people can be about driving in water like this. Granted, I probably shouldn't have been out there either, but I'm driving slowly through the water in a Jeep with plenty of ground clearance. I wasn't worried about flooding the engine as long as I stayed on the road. That much can't be said for the idiots charging through the water in minivans and cars. I'm very surprised that none of them flooded their cars while I was there.
A couple of houses along that road had water right up to the foundations. They did have power, so I hope their sump pumps were able to keep the basements reasonably dry. I'm guessing that over the next week there will be a lot of flood damaged property sitting by the curb for pickup.
With all that said, I'm pretty confident now that the next major project for my house will be a new patio. For something different, I'm going to have this one slope AWAY from the house. If I had that kind of slope right now I'd only have had minimal water in the basement, and not a steady stream.
Saturday, June 7, 2008

Saturday, May 31, 2008
Granite Tile Backsplash
I've been slacking on the counter top work for a while. Too many other little projects took up my time. I've really wanted to get working on the backsplash, since the design I'm doing is a little different than I've done before.
On the previous backsplash I did I just used a 4" tall tile with a bullnose edge. I wasn't happy with the finished result because the whole backsplash just looked too thin.
For this backsplash I'm using tile cut to 4" tall, but capping it with a pencil trim all the way around.

At the corners I'm cutting the pencil trim to 45 degree angles. The gap between the vertical and horizontal surfaces will be filled with caulk.
To create the little gap I'm looking for and to keep the tiles from sliding down the wall I taped some washers in place. A benefit from having done so much metal fabrication work is that I've got a good selection of hardware like this in various sizes and thicknesses.

On the previous backsplash I did I just used a 4" tall tile with a bullnose edge. I wasn't happy with the finished result because the whole backsplash just looked too thin.
For this backsplash I'm using tile cut to 4" tall, but capping it with a pencil trim all the way around.

At the corners I'm cutting the pencil trim to 45 degree angles. The gap between the vertical and horizontal surfaces will be filled with caulk.
To create the little gap I'm looking for and to keep the tiles from sliding down the wall I taped some washers in place. A benefit from having done so much metal fabrication work is that I've got a good selection of hardware like this in various sizes and thicknesses.

Sunday, May 18, 2008
New Microwave Install
Part of the kitchen remodel includes an over-the-stove microwave. This will free up a lot of counter space. Earlier in the work I installed a new electrical line specifically for the microwave, and also marked the stud locations on the wall behind the microwave.
The install kit includes bolts for securing the mounting plate to studs as well as hardware for mounting to the drywall.
The strongest method is securing the plate directly to the studs. In my case, the stud locations only allowed me to use one of the two studs. The right side of the microwave (the heavier side, by the way) is secured with three screws into the stud while the left side is secured with three drywall butterfly bolts.
As I was deciding which cabinets to order I was worried about the final height of the microwave. I'm around 6' 3" and didn't want the microwave blocking my view of the stove top because of it being placed too low, so I went with a slightly shorter cabinet above the stove than was recommended. After the cabinet was installed I could determine what size spacer would be best used between the cabinet and microwave. In my case, about 4" was ideal. 4" was also the height of the toe-kicks that I got for the lower cabinets.
A spacer was made with the toe-kick which works nicely to space the microwave where I want it. I need to do a little custom work for the mounting bolts now that go through the cabinet, because the bolts aren't made to handle anything longer than a 3" spacer. I'll go with longer bolts if I can find 'em.

The install kit includes bolts for securing the mounting plate to studs as well as hardware for mounting to the drywall.
The strongest method is securing the plate directly to the studs. In my case, the stud locations only allowed me to use one of the two studs. The right side of the microwave (the heavier side, by the way) is secured with three screws into the stud while the left side is secured with three drywall butterfly bolts.
As I was deciding which cabinets to order I was worried about the final height of the microwave. I'm around 6' 3" and didn't want the microwave blocking my view of the stove top because of it being placed too low, so I went with a slightly shorter cabinet above the stove than was recommended. After the cabinet was installed I could determine what size spacer would be best used between the cabinet and microwave. In my case, about 4" was ideal. 4" was also the height of the toe-kicks that I got for the lower cabinets.
A spacer was made with the toe-kick which works nicely to space the microwave where I want it. I need to do a little custom work for the mounting bolts now that go through the cabinet, because the bolts aren't made to handle anything longer than a 3" spacer. I'll go with longer bolts if I can find 'em.

Saturday, May 17, 2008
Grout - It's not Just for Breakfast Anymore
I used a color called "charcoal" for the grout. The flash of the camera really makes it look lighter than it is. Under normal lighting it blends in well with the rest of the tile.

I'm also very happy with how the pieces I fabricated for the front corners turned out. I used regular flat tile and cut it to size on the tile saw. Then the angle grinder was used to rough the pieces out to about 95% of the final size. A couple of different grits on the sander took it to the final size.
A couple of coats of polyurethane later and the cut pieces blend in perfectly with the regular tiles. They're not perfect, but they don't stand out in any way, which is what I was aiming for.
The backsplash is next.

I'm also very happy with how the pieces I fabricated for the front corners turned out. I used regular flat tile and cut it to size on the tile saw. Then the angle grinder was used to rough the pieces out to about 95% of the final size. A couple of different grits on the sander took it to the final size.
A couple of coats of polyurethane later and the cut pieces blend in perfectly with the regular tiles. They're not perfect, but they don't stand out in any way, which is what I was aiming for.
The backsplash is next.
Saturday, May 10, 2008
Surprise, Another Post on Installing the Counter Tops!
I broke out the tile saw today to get things rolling. I got this saw at Home Depot a couple years ago for around $90.00 or so. So far, it's performed well, although the fence is semi-useless as it's extremely hard to get it set up properly. Either way, I haven't had any real problem cutting straight lines with it. The final cuts aren't as perfect as the factory cuts on the tiles, but they're pretty darn good.

It's got a deep enough cut to be able to go through the trim pieces in one pass.

As mentioned earlier I am laying out the tiles on these two tops to have the center piece be full-width. The top and front are cut and installed, but I still need to do the sides and backsplash. I'll take care of these after the adhesive for these tiles is completely dry. I could do it while the adhesive is setting, but I think I'm better off waiting

I picked up a corner trim piece. The other option was to use two straight sections and miter the ends at 45 degrees on each. I did that once before and don't like how it looked compared to a pre-cut piece.

Done for the day. Tomorrow I'll try and get the edging done.

Coming up I'm going to need to get creative on some of the edges. The main surfaces are glossy and smooth while the edges are dull and slightly rough. Two corners by the stove will have the rough edges exposed, and they'll stand out like a sore thumb. That is unless I find a way around it.
I picked up a disc for the angle grinder that is supposed to easily cut & trim granite.

I took a standard edge and tried rounding the corner over, similar to a bullnose corner. As you can see in the picture it's now rough and really stands out.

I used some clear polyurethane to coat the rough edge and it did a great job in mirroring the shine. The edge of the tile is still too rough and needs some sanding with a very fine grit, but it's a good way to verify that it'll work.


It's got a deep enough cut to be able to go through the trim pieces in one pass.

As mentioned earlier I am laying out the tiles on these two tops to have the center piece be full-width. The top and front are cut and installed, but I still need to do the sides and backsplash. I'll take care of these after the adhesive for these tiles is completely dry. I could do it while the adhesive is setting, but I think I'm better off waiting

I picked up a corner trim piece. The other option was to use two straight sections and miter the ends at 45 degrees on each. I did that once before and don't like how it looked compared to a pre-cut piece.

Done for the day. Tomorrow I'll try and get the edging done.

Coming up I'm going to need to get creative on some of the edges. The main surfaces are glossy and smooth while the edges are dull and slightly rough. Two corners by the stove will have the rough edges exposed, and they'll stand out like a sore thumb. That is unless I find a way around it.
I picked up a disc for the angle grinder that is supposed to easily cut & trim granite.

I took a standard edge and tried rounding the corner over, similar to a bullnose corner. As you can see in the picture it's now rough and really stands out.

I used some clear polyurethane to coat the rough edge and it did a great job in mirroring the shine. The edge of the tile is still too rough and needs some sanding with a very fine grit, but it's a good way to verify that it'll work.

Thursday, May 8, 2008
Counter Top Tiling
To date I've used granite tile to finish one kitchen and two bathrooms as part of a remodel a few years back. That was my first experience at tiling and there are a few things I would now do differently.
One thing which I wasn't happy with was a slight unevenness in some areas. We rushed the job a little and didn't spend enough time making sure everything was as straight as possible. From a standing position it wasn't noticeable, but when you ran your hand over the top you could feel it.
I wanted to make sure that didn't happen this time around. Mainly, because I'm living in this house - it's not a flip.
What I'm trying this time is setting the main full-size tiles as a starter row. I'll spend extra time getting this row as perfectly flat and even as possible so that when I add the rows on either side I'll have a good base to work from.
The two full size tiles and edge trim were stuck down, and the edge trim was shimmed into place with folded heavy paper (alright, junk mail) to get it exact. After these dry I'll work on the rest of the top without fear of accidentally moving these starter tiles.
To make sure the tiles are flat I'm using a couple of different techniques:
First I eyeball it to make sure the edges are lined up. Gentle tapping is used to help seat the tiles and to get the top surfaces even with each other.
Next, a straight edge and level are used to make sure they are also nice and flat over the full depth of the top.
Last, I take a 5" drywall taping knife and stand it up on edge on the tiles near the joint. I slowly push the blade towards the adjoining tile to make sure it slides easily onto the next tile without getting hung up on an uneven joint. It's run both ways over the tile and at a number of points across the length of the joint. If it doesn't get hung up the joints should be pretty damn close to perfect.
By contrast, when I do the travertine flooring I just use my hand and run it across the tiles to make sure I'm happy with the heights. In my opinion, the flooring is nowhere near as critical as the counter top.
In the picture you can see the 1/16" spacers between the tiles. The tiles which will flank the full size tiles will be about 6-1/8" wide each.

The last time I did the granite tile tops I just used the 4" bull-nose edge across the back for the back splash (shown here upside down). It worked well, but looked a little plain.
This time around I'm going to cut 4"x12" strips from full-size or scrap tile to use across the back. I'll cap it with the pencil trim shown here. These pieces are just taped in place for now to see how they'll look. I think it'll add just enough "extra" to make this top look "complete".

One thing which I wasn't happy with was a slight unevenness in some areas. We rushed the job a little and didn't spend enough time making sure everything was as straight as possible. From a standing position it wasn't noticeable, but when you ran your hand over the top you could feel it.
I wanted to make sure that didn't happen this time around. Mainly, because I'm living in this house - it's not a flip.
What I'm trying this time is setting the main full-size tiles as a starter row. I'll spend extra time getting this row as perfectly flat and even as possible so that when I add the rows on either side I'll have a good base to work from.
The two full size tiles and edge trim were stuck down, and the edge trim was shimmed into place with folded heavy paper (alright, junk mail) to get it exact. After these dry I'll work on the rest of the top without fear of accidentally moving these starter tiles.
To make sure the tiles are flat I'm using a couple of different techniques:
First I eyeball it to make sure the edges are lined up. Gentle tapping is used to help seat the tiles and to get the top surfaces even with each other.
Next, a straight edge and level are used to make sure they are also nice and flat over the full depth of the top.
Last, I take a 5" drywall taping knife and stand it up on edge on the tiles near the joint. I slowly push the blade towards the adjoining tile to make sure it slides easily onto the next tile without getting hung up on an uneven joint. It's run both ways over the tile and at a number of points across the length of the joint. If it doesn't get hung up the joints should be pretty damn close to perfect.
By contrast, when I do the travertine flooring I just use my hand and run it across the tiles to make sure I'm happy with the heights. In my opinion, the flooring is nowhere near as critical as the counter top.
In the picture you can see the 1/16" spacers between the tiles. The tiles which will flank the full size tiles will be about 6-1/8" wide each.

The last time I did the granite tile tops I just used the 4" bull-nose edge across the back for the back splash (shown here upside down). It worked well, but looked a little plain.
This time around I'm going to cut 4"x12" strips from full-size or scrap tile to use across the back. I'll cap it with the pencil trim shown here. These pieces are just taped in place for now to see how they'll look. I think it'll add just enough "extra" to make this top look "complete".

Wednesday, May 7, 2008
Granite Tile Counter Tops
I wanted to start building the counter tops yesterday, but I made the mistake of meeting with our company's personal trainer and he proceeded to destroy my arms for the day. By the time I got home, there was no way I was going to start screwing around with plywood and power tools. I got out easy - a senior VP he was also working with at the time said she could barely move after they were done.
That left the counter top work for today.
I'm sort-of making up the final sizes as I go along here, and the first piece I do will be the smallest of the counter tops. During the creation of this first top I'll figure out what kind of layout I want for the grout lines, how big the tile spacing will be, etc.
So far, I'm measuring, thinking, measuring, drawing out my options, measuring, and then cutting the plywood. I'm starting things off with two layers of plywood totaling 1" thick combined (3/4" and 1/4"). On top of that will be 1/4" of cement board. That 1-1/4" will match the thickness of the edging I am using and will make the tile look like a thick slab instead of thin tiles.

The tile I am using is called Green Mountain. I've used it before in a renovation with the same color combinations we have in this kitchen and really like how it looks. I'm adding lights under the upper cabinets which will really show off the color and sparkle of the tile.
I a hoping to be able to use the layout shown below, but the overall cabinet width that I need to cover is probably going to be about 1/4" too wide to pull this off due to the side panels I added to dress the cabinet up. If I try putting the tiles like this I'll probably end up with wide grout lines, which I don't want. If I run a full-width tile in the center of the cabinet and approximately 6-1/4" wide tiles to each side of it I should be OK. I might waste more tile, but such is life.

That left the counter top work for today.
I'm sort-of making up the final sizes as I go along here, and the first piece I do will be the smallest of the counter tops. During the creation of this first top I'll figure out what kind of layout I want for the grout lines, how big the tile spacing will be, etc.
So far, I'm measuring, thinking, measuring, drawing out my options, measuring, and then cutting the plywood. I'm starting things off with two layers of plywood totaling 1" thick combined (3/4" and 1/4"). On top of that will be 1/4" of cement board. That 1-1/4" will match the thickness of the edging I am using and will make the tile look like a thick slab instead of thin tiles.

The tile I am using is called Green Mountain. I've used it before in a renovation with the same color combinations we have in this kitchen and really like how it looks. I'm adding lights under the upper cabinets which will really show off the color and sparkle of the tile.
I a hoping to be able to use the layout shown below, but the overall cabinet width that I need to cover is probably going to be about 1/4" too wide to pull this off due to the side panels I added to dress the cabinet up. If I try putting the tiles like this I'll probably end up with wide grout lines, which I don't want. If I run a full-width tile in the center of the cabinet and approximately 6-1/4" wide tiles to each side of it I should be OK. I might waste more tile, but such is life.

Subscribe to:
Posts (Atom)