Friday, July 18, 2008

Trip Pictures

If I don't do this now I'll probably forget to do it, so here are some of the highpoints of the road-trip.

The first major site we hit was Mount Rushmore, the weekend after July 4. The rid on top of Roosevelt's head was for the removal of the fireworks hardware which was used for the celebration. It'd have been cool if they could have made showers of sparks shoot out of Jefferson's eyes, but that probably would be dignified.


Next up was a drive through Custer National Park, a very scenic and cool drive. The animals roam free, and these two buffalo came in for a nice close-up. This one was inches from my door as I passed him - I could have easily touched him as we went past.


We went through Deadwood, which was a disappointment for me since I'm not a gambler. I was hoping for more of a historic city. We went up to the cemetery where Wild Bill Hickock is buried and saw the grave sites of a number of notable Deadwood's past citizens.


The main focus of the trip was going to Yellowstone for 3 nights. I knew it was a big place before we went, but if you've never been there it's hard to fathom just how massive the park is. I drove around 300 miles within the park and seldom drove on the same road twice.

How do you sum up Yellowstone in a couple of pictures? You can't.

This is the Grand Canyon of the Yellowstone. There was a late thaw so there was still snow on the ground in places. The water was flowing much more heavily than normal for this time of year, so the falls were more spectacular than normal (from what I was told).


Instead of putting up a picture of Old Faithful (I have about 50) I'm going with a thermal pool. The colors are actually different types of algae which live in the different water temperatures. This pool used to be blue in the middle, but crap throw in by vandals over the decades changed the temp of the water causing it to reflect green instead of blue.


We took two days to drive from Yellowstone to Milwaukee, but didn't skip a small side-trip to Devil's Tower in Wyoming. Anybody who's seen Close Encounters of the Third Kind has seen it. I'm not a rock climber so I didn't get to go to the top.


The weather was about perfect - 70's and 80's for the entire trip, with cooler temps in the mountains. There was no rain for about 2,500 miles of driving meaning the Jeep got to bring back a few thousand souvenirs for me.

A Case of Slacker-itis

Alright, alright. It's been a while since my last post.

In my defense, I've been doing other things. Working. Sleeping. Eating. Blah, blah blah.

Really though, most of my time recently has been spent preparing for and going on a road-trip with the family to Yellowstone. Since we drove, there was a lot of preparation for the vehicle, packing. etc.

I got some very nice pictures that I'll post in the future, covering stops in Yellowstone and the Black Hills (Custer National Park, Deadwood, Mount Rushmore). In fact, I took just over 1,200 pictures over the 10 day trip. Now I need to spend a lot of time weeding through to get the best pictures - who wants to look at 90 pictures of the same waterfall??

We also had some very cool close-encounters (good description, as we also went to Devil's Tower) with some buffalo. Close enough that I could have reached out the window and slapped one, possibly earning some major scarring to the Jeep in the process.

Nature is pretty cool, even if you have to drive over 3,000 miles round-trip to see it!

Sunday, June 8, 2008

Flood Pictures

Today we had another pretty heavy storm roll through. Luckily it was much shorter in duration than the one 12 hours before. The rain ended a few hours ago, and I decided to get out of the house to see what the flooded areas look like today.

Closest to my house is a somewhat low-lying area which is a tree nursery. Down the center of this picture is normally a small creek with maybe 1' of water in it. It's usually only about 4' wide with slow moving water.

Now it's reached the top (about 20' across), but yesterday all the ground in this picture was under at least a foot of running water. From the tree-line on the left and swamping the small trees/shrubs on the right.


Farther up-stream is a new bridge over the same creek. At this time last year there was about 75% of the flow capacity that is there now. Currently the water is flowing about 2' below maximum height. Last night it was about 2" from overflowing onto the road when I drove by. It could have maxed out and flowed onto the road at some point.


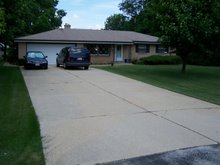
The water flows under the road and appears to flow directly into this house, about 50 yards up the side-road. Anybody want to guess what the guy in the picture is thinking right about now?


In reality, it's the office for the same tree nursery shown in an earlier picture and the water flows under it. It must have been built here on the assumption that the water will never be high enough to hit the building. I've seen it within a foot before after some heavy storms, but last night the water was at capacity under the building and was therefore forced to flow around it. They're lucky it didn't tear the place down. I'm assuming they had plenty of wet carpet in there today.

If you're wondering about erosion making the place fall, the whole creek leading up to the building is cement and rock, as are the creek walls under the place. That's not to say that it'll prevent water from destroying the house though, because Mother Nature can be nasty when she wants to be. Erosion has destroyed far better designs than this.


Right about where the 3rd car is (the dark one driving away in this picture) is where there was about 6" of water over the road last night. Today it's dry, but the ditches on either side of the road are still very active.


Too bad this home/business doesn't have one of those "active" ditches. As of today the people who live here are still pretty screwed. I don't care how good their sump pump is, they can't have a dry basement today. Last night the water was up against the business (the block building - yes, I know it's ugly as hell) and there was a car in the driveway right in front of the door which was up to it's rims in water.

As of an hour ago, the city came by to place a pump in the water to try and get the level down somewhat. The houses next to these guys were almost as bad off, although they did have power after the storm was done so at least they had lighting to work by.


This was the first time I really took notice as to how far my house is above the water. On my drive back home I noticed that I go up a couple of very small hills - enough to put me about 10-15' above this water level. While 10-15' may not sound like much, it'd take a LOT bigger storm than this to raise the water level to the point where I'm underwater. I hope...

Saturday, June 7, 2008

...A Three Hour Tour... (Sing Along)

We had a pretty major storm roll through today.

This was the hardest rain I've seen since we moved in, and the most rain in such a short time (3-4 hours) my neighbor has seen in his 26 years in this neighborhood.

I expected that I would get some water in the basement, as it's happened before when we got some major storms. But this storm was just a little heavier than usual.

While I was in the basement moving some stuff out of the way of the water so it had a clean path from the wall to the floor drain I heard what sounded like a hose running. Inside the house. Not a good sound to hear.

I noticed some water dripping down the dryer's exhaust vent and I figured that was what was making the sound. Only there wasn't enough visible water to justify the sound.

So I pulled the dryer away from the wall and pulled the vent off the back and was greeted with a flood of water coming down through the vent. It was about equal to what you'd get by sticking a garden hose in the vent.

As of this morning, the dryer worked well. I'm hoping that it was designed with the electronics up high enough in the box to avoid water damage, otherwise I'll be buying a new dryer in a few days. I'm going to give this one a few days to dry out just to be safe.

Other than the possible dryer, there was no damage done other than a few empty cardboard boxes getting soaked. I'd say that there were easily over 500 gallons of water that flowed through the basement today, and I know I'm luckier than some others in the neighborhood.

I took a drive with my neighbor after the storm stopped, and we were amazed at how much water was flowing in the ditches and creeks. At one point I estimate we were driving through at least 6" of water.

What really surprises me is how stupid people can be about driving in water like this. Granted, I probably shouldn't have been out there either, but I'm driving slowly through the water in a Jeep with plenty of ground clearance. I wasn't worried about flooding the engine as long as I stayed on the road. That much can't be said for the idiots charging through the water in minivans and cars. I'm very surprised that none of them flooded their cars while I was there.

A couple of houses along that road had water right up to the foundations. They did have power, so I hope their sump pumps were able to keep the basements reasonably dry. I'm guessing that over the next week there will be a lot of flood damaged property sitting by the curb for pickup.

With all that said, I'm pretty confident now that the next major project for my house will be a new patio. For something different, I'm going to have this one slope AWAY from the house. If I had that kind of slope right now I'd only have had minimal water in the basement, and not a steady stream.

Saturday, May 31, 2008

Granite Tile Backsplash

I've been slacking on the counter top work for a while. Too many other little projects took up my time. I've really wanted to get working on the backsplash, since the design I'm doing is a little different than I've done before.

On the previous backsplash I did I just used a 4" tall tile with a bullnose edge. I wasn't happy with the finished result because the whole backsplash just looked too thin.

For this backsplash I'm using tile cut to 4" tall, but capping it with a pencil trim all the way around.


At the corners I'm cutting the pencil trim to 45 degree angles. The gap between the vertical and horizontal surfaces will be filled with caulk.

To create the little gap I'm looking for and to keep the tiles from sliding down the wall I taped some washers in place. A benefit from having done so much metal fabrication work is that I've got a good selection of hardware like this in various sizes and thicknesses.

Sunday, May 18, 2008

New Microwave Install

Part of the kitchen remodel includes an over-the-stove microwave. This will free up a lot of counter space. Earlier in the work I installed a new electrical line specifically for the microwave, and also marked the stud locations on the wall behind the microwave.

The install kit includes bolts for securing the mounting plate to studs as well as hardware for mounting to the drywall.

The strongest method is securing the plate directly to the studs. In my case, the stud locations only allowed me to use one of the two studs. The right side of the microwave (the heavier side, by the way) is secured with three screws into the stud while the left side is secured with three drywall butterfly bolts.

As I was deciding which cabinets to order I was worried about the final height of the microwave. I'm around 6' 3" and didn't want the microwave blocking my view of the stove top because of it being placed too low, so I went with a slightly shorter cabinet above the stove than was recommended. After the cabinet was installed I could determine what size spacer would be best used between the cabinet and microwave. In my case, about 4" was ideal. 4" was also the height of the toe-kicks that I got for the lower cabinets.

A spacer was made with the toe-kick which works nicely to space the microwave where I want it. I need to do a little custom work for the mounting bolts now that go through the cabinet, because the bolts aren't made to handle anything longer than a 3" spacer. I'll go with longer bolts if I can find 'em.

Saturday, May 17, 2008

Grout - It's not Just for Breakfast Anymore

I used a color called "charcoal" for the grout. The flash of the camera really makes it look lighter than it is. Under normal lighting it blends in well with the rest of the tile.


I'm also very happy with how the pieces I fabricated for the front corners turned out. I used regular flat tile and cut it to size on the tile saw. Then the angle grinder was used to rough the pieces out to about 95% of the final size. A couple of different grits on the sander took it to the final size.

A couple of coats of polyurethane later and the cut pieces blend in perfectly with the regular tiles. They're not perfect, but they don't stand out in any way, which is what I was aiming for.

The backsplash is next.